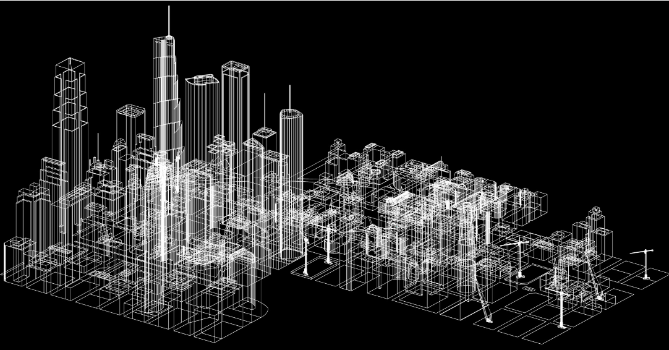
.png)
Simplify your next project with a 4-step BIM workflow
Introduction
Building projects can be complex and time-consuming, but using a structured BIM workflow can simplify the process. BIM, or Building Information Modeling, helps manage and visualize project details more effectively. This article breaks down a four-step workflow to help you streamline your next project. From setting clear goals to leveraging technology for model analysis, these steps will keep your project on track and reduce errors. With a clear roadmap, you can focus on delivering better results with less stress and confusion. Let’s dive into these steps for a smoother project experience.
Step 1: Define Project Requirements and Goals
The first step in any successful BIM workflow is to define your project’s requirements and goals. Start by clearly identifying the project’s scope, including what needs to be accomplished and by when. Meet with all relevant stakeholders—architects, engineers, contractors, and clients—to gather their input and align expectations. This ensures that everyone understands the project’s objectives from the beginning, which helps prevent confusion or disagreements down the line.

Next, determine the Level of Development (LOD) and Level of Accuracy (LOA) needed for each project stage. These standards help define the amount of detail required and establish a benchmark for quality. Make sure to document all these specifications, including model-sharing formats, data exchange requirements, and any special considerations such as sustainability or regulatory compliance. This sets the foundation for a smooth project execution.
It’s also crucial to outline deliverables, timelines, and budget constraints. Be as detailed as possible when setting milestones and deadlines. Allocate resources based on the project’s needs and set aside contingencies for unforeseen changes. Having these requirements clearly defined allows for more accurate planning, reduces the risk of scope creep, and helps keep the project within budget.
Finally, develop a communication plan to ensure all parties are regularly updated and have access to necessary information. This keeps everyone on the same page and minimizes delays caused by miscommunication. With a solid framework in place, your project is set up for success, avoiding common pitfalls right from the start.
Step 2: Develop a Detailed BIM Execution Plan (BEP)
Creating a BIM Execution Plan (BEP) is a crucial step in ensuring project success. A BEP acts as a blueprint for managing project data, defining roles, and ensuring effective communication. Begin by outlining team responsibilities and assigning specific tasks to each member. Include guidelines for model-sharing protocols, data exchange methods, and software standards to maintain consistency throughout the project.
A strong BEP also addresses collaboration strategies. Define how often meetings will take place, what tools will be used for real-time coordination, and how potential conflicts will be managed. This plan should include methods for clash detection and resolution to minimize design conflicts during construction.

Also, specify how updates will be managed in the BIM model. Establish a clear version control system to track changes, ensuring that everyone has access to the most current information. Outline how frequently the model will be reviewed and who will approve changes to prevent discrepancies.
Finally, include a risk management strategy within the BEP. Identify possible challenges that might arise, such as software incompatibilities or communication breakdowns. Plan for these issues by creating contingency measures that address each potential risk. This proactive approach will help you mitigate issues before they escalate.
By creating a detailed BEP, you can avoid common project pitfalls, streamline workflows, and keep your team aligned throughout the entire lifecycle of the project. It acts as a single source of truth, ensuring that all stakeholders are working towards the same goals with a clear understanding of the project’s direction.
Step 3: Create and Manage the BIM Model
Creating and managing the BIM model is the core of the workflow. Start by building a central model that incorporates all major components—architectural, structural, and MEP (Mechanical, Electrical, Plumbing). Use a shared platform where team members can access, edit, and update the model in real-time. This central repository ensures that everyone works with the same data, reducing errors and conflicts.

As the project evolves, continuously update the model to reflect design changes and client feedback. This real-time updating keeps the model relevant and accurate, minimizing the chances of miscommunication. Utilize model-checking tools to ensure compliance with project standards and the BEP guidelines. For instance, run clash detection regularly to identify and resolve potential conflicts early on.
Additionally, organize the model by breaking it into manageable segments. Use naming conventions and standardized structures to make navigation easier. Managing the model effectively means implementing a version control system to track changes and maintain model integrity. This way, if any errors occur, you can easily revert to a previous version without losing critical data.
Managing the model goes beyond just creating it; it’s about maintaining its accuracy and ensuring it serves as a reliable source of truth for the entire team. With proper management, the BIM model will not only drive efficient collaboration but also provide valuable insights that aid decision-making and project optimization.
Step 4: Leverage Technology for Model Analysis and Optimization
Technology plays a key role in analyzing and optimizing your BIM model. Start by leveraging AI-based tools for tasks like clash detection, which automatically identifies conflicts between design elements. This reduces time spent on manual checks and improves model accuracy. Use machine learning algorithms to analyze project data, predict outcomes, and provide insights for better decision-making. Quantity takeoff tools can also automate material calculations, ensuring precise cost estimations. Additionally, run simulations for energy efficiency and sustainability, helping you design buildings that meet performance goals. This tech-driven approach streamlines workflows and boosts project efficiency.
Embracing technology goes beyond just simplifying manual tasks—it opens up new possibilities for innovation and problem-solving. Automated processes allow you to focus on complex issues, while simulations and predictive analytics provide insights that help foresee potential problems. By incorporating technology into your BIM workflow, you enhance project planning, reduce risks, and make data-driven decisions that benefit the project’s overall success. Using the right tools, your BIM model becomes a dynamic asset that drives better project outcomes and boosts efficiency from start to finish.
Conclusion
Simplifying your project with a 4-step BIM workflow enables better coordination, fewer errors, and smoother project delivery. By defining clear requirements, creating a strong BIM Execution Plan, managing your model effectively, and leveraging technology, you ensure that every project phase is optimized for success. With this approach, you’ll be able to handle complex projects with greater ease, delivering quality results on time and within budget. Embrace this structured process to streamline your workflow and make your next project a success from start to finish.