Bidlight Model Health Checker Plugin
Introduction
The BidLight offers a powerful Revit plugin designed to help users maintain and improve the quality of their Building Information Modeling (BIM) projects. This kind of plugin is valuable for ensuring that Revit models are accurate, efficient, and compliant, ultimately improving project outcomes and reducing the risk of issues during the construction or design phases. This comprehensive guide will help you set up and use Bidlight Model health checker effectively, from installation and configuration to running checks and interpreting reports.
Feature:
Error Detection: Identifies and highlights potential errors or inconsistencies within Revit models.
Quality Assurance: Ensures that models adhere to specified standards and best practices.
Performance Optimization: Helps in optimizing the performance of Revit models by suggesting improvements or flagging issues that could affect performance.
Compliance Checks: Verifies that models meet regulatory or client-specific requirements.
Getting Started
Installation
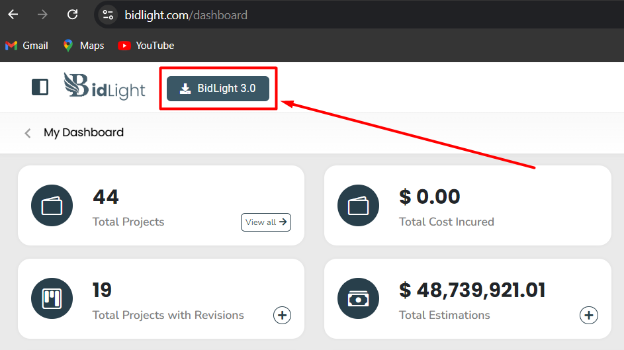
Visit our download page: Bidlight Download.
Click the Bidlight download
Click on the Bidlight installer and save the installer file to your computer.
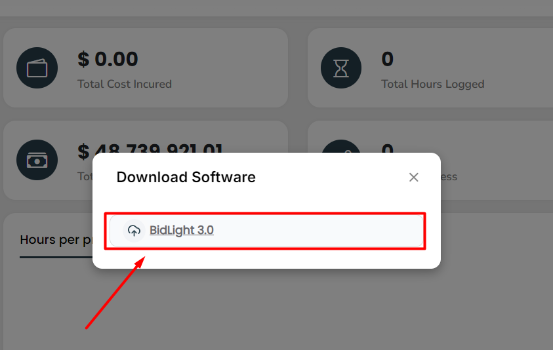
Double-click the downloaded file to begin the installation process.
Follow the on-screen instructions. This typically involves agreeing to the terms of service, choosing an installation directory, and completing the installation.
Troubleshooting
If you encounter issues during installation, consult our troubleshooting guide: Bidlight Support. Common issues include permission errors or conflicts with other Revit add-ins.
Launching the Tool:
Start Revit as you normally would.
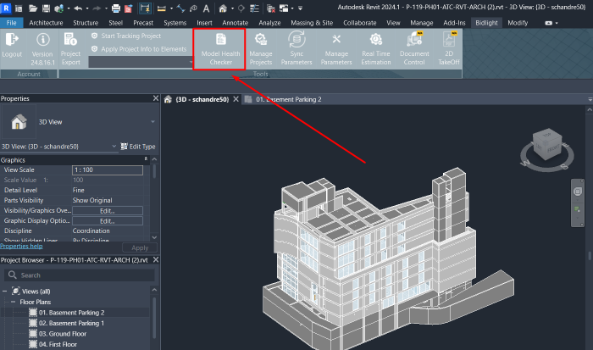
Go to the "Bidlight" tab on the Revit ribbon.
Locate and click on Model health checker in the list of available add-ins.
It should open a new interface in Revit where you can access its features.
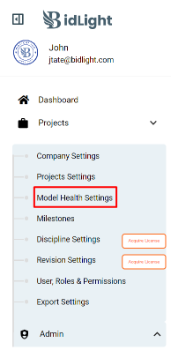
Configuring Health Check Settings
Access the Settings Website:
Open your web browser and navigate to: Bidlight Model Health Settings.
Log In or Create an Account:
If you already have an account, enter your credentials to log in.
If you are a new user, click on "Create Account" and follow the prompts to register.
Adjust Settings:
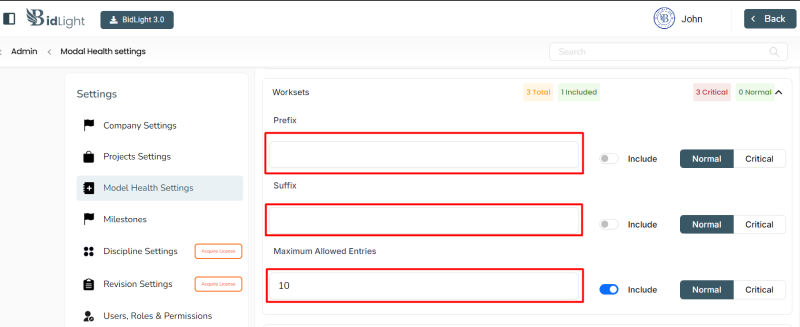
Link Limit:
Purpose: Prevents model complexity and slow performance by controlling the number of linked files.
Configuration: Set a maximum acceptable number of links for your project. For example, limit to 50 links.
Impact: The system will check if the number of links exceeds this limit and report any issues.
Number of Views:
Purpose: Helps manage the performance of your model by controlling the number of views.
Configuration: Specify the maximum number of views allowed in a project. For example, a limit of 100 views might be set for a complex project.
Impact: Bidlight will identify if your model has too many views, which can affect performance and usability
Number of Parameters:
Purpose: Prevents models from becoming overly complex with excessive custom parameters.
Configuration: Define the maximum number of parameters that are acceptable. For example, you might set a limit of 200 parameters.
Impact: Bidlight will flag models with parameters exceeding this number, helping maintain model efficiency.
Naming Conventions:
Purpose: Ensures consistency in element naming to improve model organization and clarity.
Configuration: Set rules for naming elements like views, parameters, and workset etc. For instance, you might require that all parameters names start with "BLT_".
Impact: Bidlight will check if elements adhere to the established naming conventions and notify you of any discrepancies.
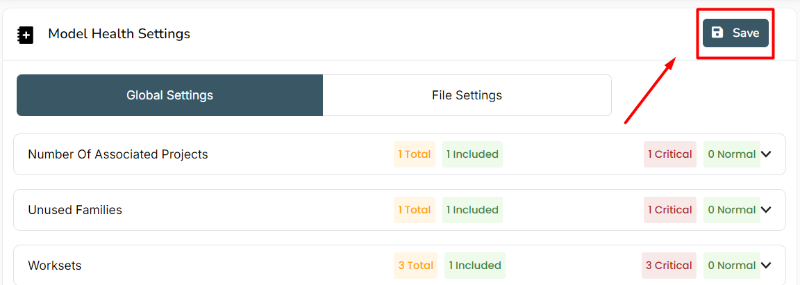
Save Settings:
After adjusting the settings, click the "Save" button to apply the changes.
These settings will now be used for health checks performed within Revit, ensuring consistency across your projects.
3. Running the Health Check in Revit
Start Revit and open the model you wish to check.
Ensure that the model is up-to-date and saved to prevent data loss during the health check.
Run the Health Check:
Access Bidlight:
Go to the " Bidlight " tab and select “Model Health Checker”.
Click on the "Run Health Check" button.
Bidlight will start analyzing the model based on the settings you configured on the website.
Bidlight will evaluate the model against the configured thresholds (links, views, parameters, naming conventions) and identify any issues.
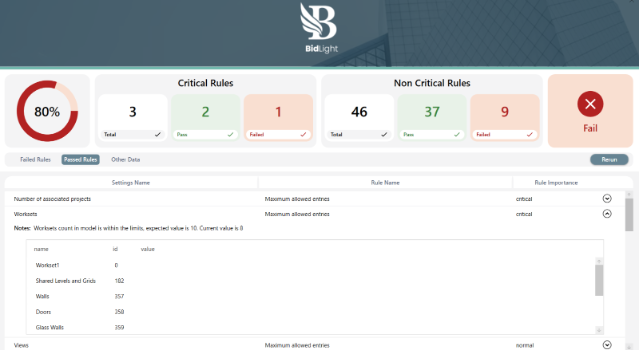
Reviewing the Summary Report:
Once the health check is complete, Bidlight will generate a summary report.
View the Report:
The report will be displayed in the Results Area of Bidlight’s interface within Revit.
Review the overview of detected issues and any recommendations provided.
4. Understanding the Summary Report
Report Overview:
Categories of Issues:
The summary report will categorize issues based on the settings you configured. Categories might include:
Links: Number of linked files exceeding the limit.
Views: Excessive number of views.
Parameters: Parameters that exceed the set limit.
Naming Conventions: Elements that do not adhere to naming rules.
Each category will provide a high-level overview of the issues detected.
Detailed Analysis:
Drill Down:
Click on each issue listed in the summary to view detailed descriptions.

Implement the suggested fixes to address the issues. This might involve reducing the number of links, views, or parameters, or renaming elements to match conventions.
5. Saving and Exporting Reports
Keep a Record:
To retain a record of the health check, the summarized report will be automatically exported to Bidlight server for future use.
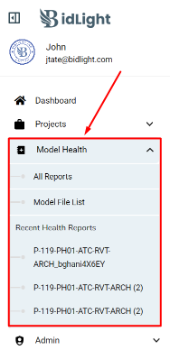
Saved records can be viewed in Bidlight website.

6. Getting Help and Support
Contact Support:
Reach Out:
For additional assistance, contact our support team at [email protected].
Provide detailed information about the issue you’re experiencing, including any screenshots if possible, to expedite the support process.
Bidlight provides Forum for FAQ
7. Best Practices
Regular Updates:
Periodically review and update your settings on our website to align with your current project needs and practices.
Frequent Health Checks:
Run health checks regularly to identify and resolve issues early, maintaining model efficiency and performance.
Use Reports for Improvement:
Utilize the summary reports to track and improve the quality of your Revit models over time.
8. Conclusion:
Thank you for choosing Bidlight! We are dedicated to helping you maintain optimal condition for your Revit models. For more information and updates, visit our website at Bidlight Website.