Ricardo
Article • 1 minute readPublished • 2 years ago
Bidlight Document Control
1. Introduction
Plug-in Name: Document Control
Description: A Revit plug-in that connects to Bidlight to manage and export Revit sheets for various projects. It allows users to select sheets, assign disciplines, and update revision details.
Purpose: The plug-in helps users control documents by exporting Revit sheets, updating revisions, and managing documents across projects and disciplines.
2. Features Overview
Project Integration: Connects to Bidlight to retrieve all projects associated with the user’s company account.
Sheet Management: Displays a grid view of Revit sheets with details like sheet number, name, status, revision number, revision date, description, and sequence number.
Discipline and Revision Assignment: Drop-down menus for assigning disciplines and project revisions, managed via the Bidlight website.
Print Settings: Options to select print settings and paper sizes from Revit’s print settings.
Export Functionality: Exports selected sheets and updates Revit with the latest revision details
, formatted as projectNumber_R(revision number).
Data Synchronization: Synchronizes exported data with the Bidlight website, where users can view and download PDFs.
Multi-Project and Multi-Discipline Support: Supports running the document control process across different projects, disciplines, and revisions.
3. Detailed Feature Descriptions
Project Integration: Explains how the plug-in connects to Bidlight and retrieves project data.
Sheet Management: Describes the grid view and the details displayed for each sheet, and the process of selecting sheets for export.
Discipline and Revision Assignment: Details the drop-down menus for disciplines and revisions, and how they are managed via the Bidlight website.
Print Settings: Describes the options for selecting print settings and paper sizes.
Export Functionality: Explains the export process and how revision details are updated in Revit, including the format of revision numbers.
Data Synchronization: Describes how exported data is synchronized with the Bidlight website.
Multi-Project and Multi-Discipline Support: Explains how the plug-in supports multiple projects, disciplines, and revisions.
4. User Workflow
Login and Select Project: User logs into Bidlight and selects a project.
Select Sheets and Settings: User selects sheets, assigns disciplines and revisions, and chooses print settings.
Export and Review: User exports sheet and reviews them in Revit and on Bidlight.
5. Conclusion
The Document Control plug-in enhances document management in Revit by providing a streamlined process for selecting, exporting, and managing Revit sheets across multiple projects and disciplines. It ensures that all revision details are accurately updated and synchronized with the Bidlight website, improving overall document control and accessibility.
Project Integration:
1. Starting Document Control Plug-in
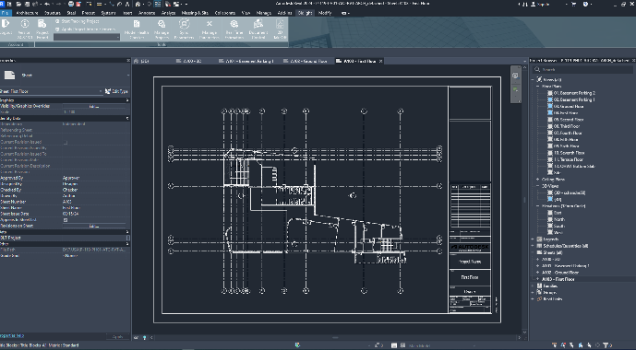
First, we are going to open the document that contains sheets that we want to export to our database.
2. Selecting Project
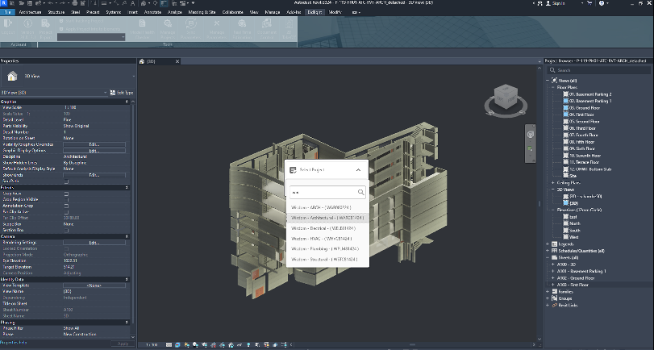
Now after running the document control, it will get all the projects which associated to the current company even created in bidlight plug-ins or from the website, so you can choose one project to export the selected sheets to it.
Sheet Management:
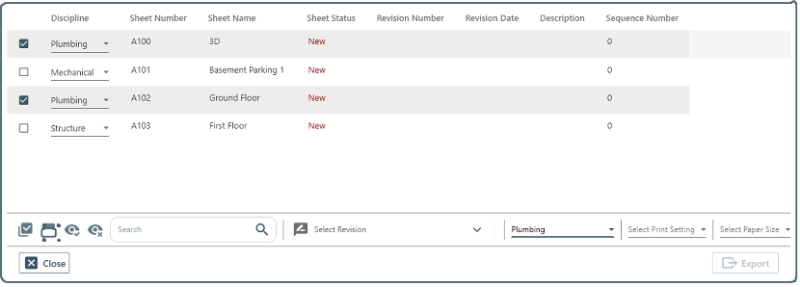
1. Main Window
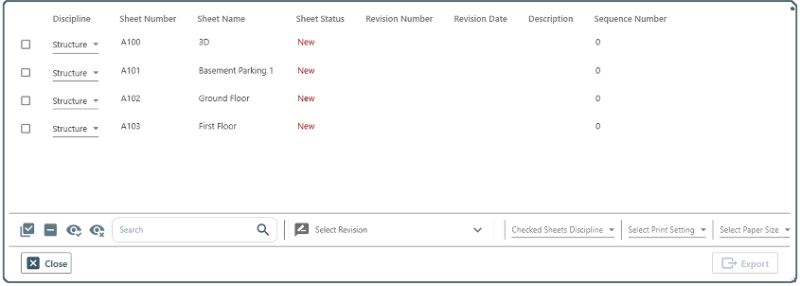
After selecting the project now, the main window of document control will pop-up, we can see all our document sheets (name, number, status, revision number, sequence number, description, revision date).
2. Helping Area
We have helping area which contains search text box so we can search for the sheets we need by typing any part of their name and we have also 4 buttons, two for check all and unchecked all and two buttons to show only checked or show only unchecked.
Discipline and Revision Assignment:
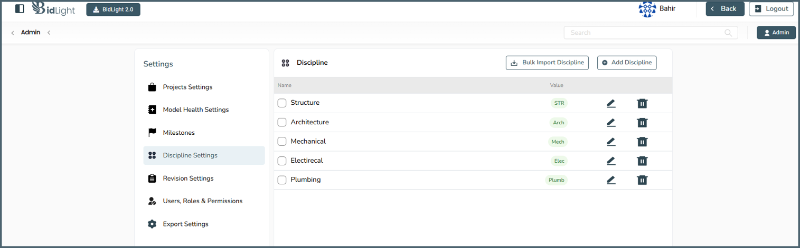
1. Selecting Disciplines
We can select for every checked sheet a discipline which will be associated to the sheet information while exporting, the company has disciplines that can be created from its account at our website, and we have drop-down below to select one discipline direct for all checked sheets.
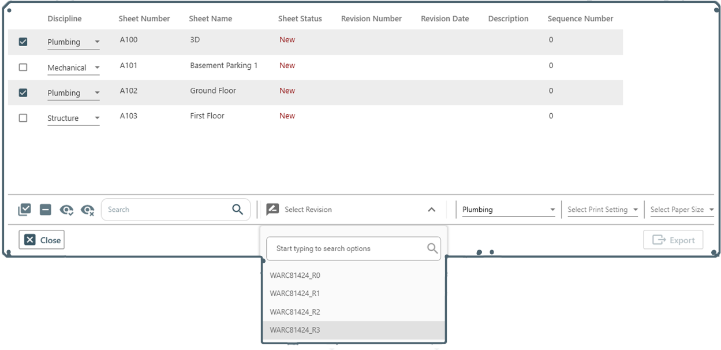
2. Selecting Revision
Now we can select revision from the below drop down which comes from the project revisions on the website, so if we select revision 5, all checked sheets will have revisions till revision 5 (1,2,3,4,5).
Print Settings & Export:
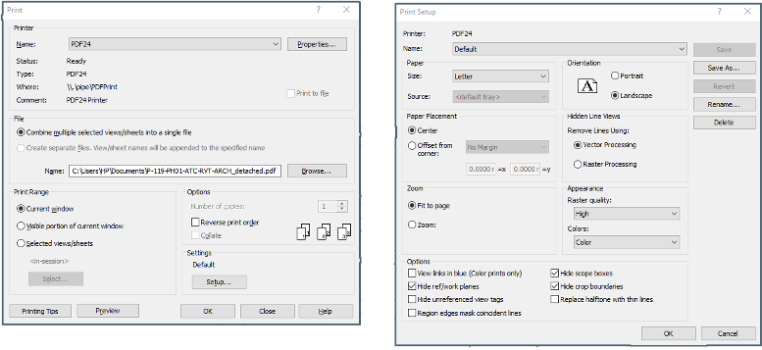
1. Revit Print Setting
We have another drop down for choosing the print setting (we use the same Revit print settings)
so, you can use your own or create, modify anyone.
2. Export
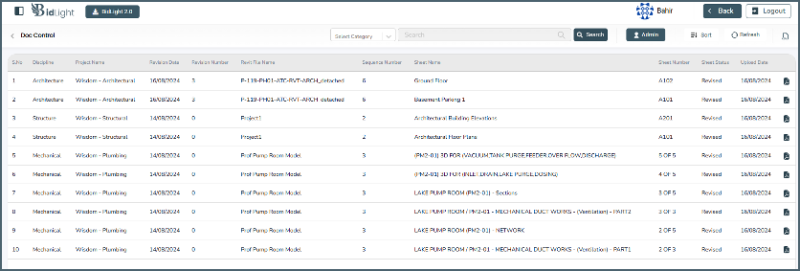
After Choosing everything we can now start exporting the checked sheets to the company database so we can access these sheets on the website at the section of “Doc Control” with all information and we can download from there.

Data Synchronization:
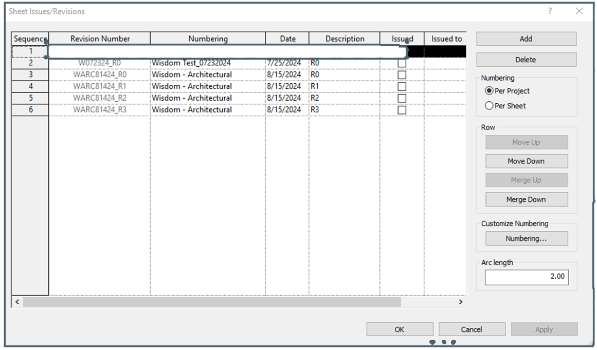
1. Revit Results
Now after exporting sheets, we can check the revisions section in Revit and we will find that the revisions are created with numbering “Project Name” and the revision number, and the revisions associated to the exported sheets.
2. Website Results
Also, we can check our company account on the website we can see the results and download any sheet.